As with all social media, it is important to use the platform to its fullest potential to maximize your return on investment.
You only have 150 characters to use in your Instagram bio — here’s how to use what little space you have to communicate and engage with your audience.
This is chapter one of a seven-part series on how to dominate your Instagram marketing.
Want the whole blog series all in one place?
You can download the ultimate guide to Dominating your Instagram Marketing now.
Looking for more specialized help? Learn more about what we can do for your social media marketing.
Anatomy of an Instagram Profile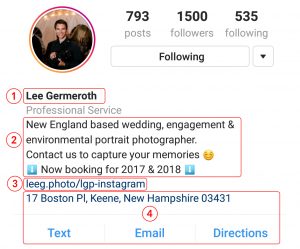
Name & Username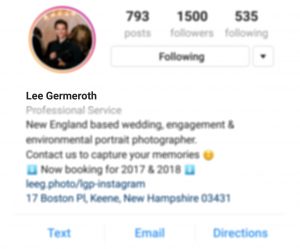
This is a pretty self-explanatory section of your profile. Generally you would either put your name or your business name here. That being said, that isn’t your only option. You can also use a short (you only have 30 characters) descriptive phrase with your target keyword in it. One word of caution with this – it is very easy to appear spammy when you are using a keyword rich name.
You also have the option to change your username any time after your profile is created. Generally, it is best to pick one username and keep it consistent though.
If you are thinking of changing your username you should create a backup account and assign your current username to that account if you ever wanted to change back to your original username.
To do that, follow these steps:
- Check to make sure the username you want is open and available.
- Create a backup account with a temporary username (it can be anything).
- Change your main account to be the new username.
- As soon as you save that switch to your backup account and grab your old username.
- For a safe measure, point the backup account to your main account.
Now you are protected, with both usernames under your control.
Bio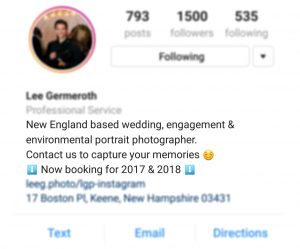
Your bio should describe exactly what you do and how you can provide value to your audience. The bio has to be concise as you only have 150 characters to get your message across. Note: spaces are included in the character count.
Top tips to maximize your bio:
- Use emojis to make your bio more lively and fun. You can use the arrow emojis to direct people to your website link below the bio.
- Use as much of the 150 characters as you can to maximize the use of the space to get your brand’s message across.
- To have line breaks in your bio, write it out in a note on your phone, and then copy and paste directly into Instagram.
- Include a call to action (CTA) to drive more clicks to your website link below.
Website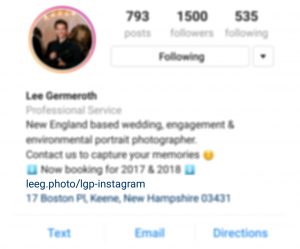
Instagram does its best to try to keep all their users on the platform, which is good if your only goal is to engage with your audience. But if you want to be able to move your followers off of Instagram and onto your website (or some other conversion point) then you only have one option — the website portion of your profile.
You only get one link, so what are you going to choose to direct people to?
There is no right or wrong answer here, but there are a few best practices to keep in mind so that you will get the biggest bang for your buck!
Your link can be dynamic.
Feel free to change the link to target your most important CTA at the time. Whether you want to drive traffic to the new blog post that you just wrote, send people to an informational landing page, or get people to sign up for your webinar, just know that you can change where the link points to whenever you please. You might ask, how do I get traffic to my new link? It is a pretty common practice to say “link in bio” or #linkinbio in the caption on your posts to send people to your profile page to click through.
Use more that one link.
Wait. I thought you just said you could only use one link? That is true, but there is a hack to get around this. Linktree is a free web app that allows you to add multiple links to your Instagram profile.
All you need to do is sign up for an account using your Instagram login. Then, in their super easy-to-use interface, add links and change the button text to whatever you want. From there, you can drag and drop to change the order of the buttons. I would recommend using between 3 to 5 buttons. More than 5 links would be too many choices for your visitors, and with two links, you might as well stick to the single profile link directly to your conversion goal.
The drawbacks to this are that giving your users multiple options could potentially make them less likely to click through, and adding a second step to the conversion process could lead to some drop-off.
Track all your links.
I mean it. Track all your links. Always.
It is important to create tracking links anytime you are posting a link that directs back to your website. This way you will be able to identify which links are driving traffic to your site, what content is compelling your audience to click through, and what that audience is doing once they get to your site.
But what if I don’t know how to track my links?
Firstly, I am going to assume that you have Google Analytics setup and tracking your website visitors. If you don’t have that then stop what you are doing and get that on your site STAT!
If you want to know all about tracking links in more detail check out this post.
There are two main options to create a tracking link. The first being using this tool from Google. It is an online tool where you can put in all the different tracking parameters and out comes a fancy tracked link.
The second option and my personal favorite is to have an Excel document with formulas to automatically create the links for you. I prefer this option because it allows you to keep a log of all your past links and what tracking you used on them. This makes it much easier to find specific campaigns and posts in your historic Google Analytics data.
To make things easier you can download an Excel template here to create and keep track of your tracking links.
 Put in your email address to download your Google Analytics campaign tracking Excel template.
Be sure to check the help tab in the downloaded template if you need instructions or examples of tracked links.
I use bit.ly for all my link shortening needs. It is very easy to set up an account and it integrates easily with a bunch of other apps. They allow you to use your own branded short domain so you can keep everything under one cohesive brand.
Business Information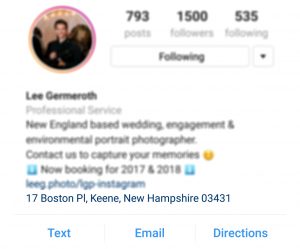
Why convert your Instagram profile to a Business Profile?
With a business account, you get access to new business features like the three buttons of call/text, email, and directions, as well as Instagram Insights.
The Insights include:
- Impressions: Total number of times your post or story was seen
- Reach: Number of unique accounts who saw your post or story
- Website Clicks: Number of accounts that have tapped the website link on your Business Profile
- Follower Activity: Average times your followers are on Instagram on a typical day
- Video Views: Number of times your video was viewed for 3 or more seconds
- Saves: The number of unique accounts that saved your post
Giving people more ways to get in touch with you makes it a convenience to contact you, and having access to data helps you make informed decisions about your business. (That’s why I harped on you to track all your links!) It is always better to have it and not need it then need it and not have it.
So if you haven’t already, you should convert to a business profile.
How to convert personal Instagram profile to a Business Profile
First off, you need to have a Facebook Business page in order to convert your profile to a business profile. Once you’ve set that up, follow these steps:
- Go to your profile and tap the settings button in the top right corner.
- Under the Account heading, tap Switch to Business Profile.
- On the Connect Your Facebook Page screen, you’ll see all of the Facebook Pages you’re currently an admin on. Select the Page you’d like to associate with your Business Profile on Instagram.
- On the Set Up Your Business Profile page, review your business’s contact information, make any changes and tap Done.
Want to change or hide one of the contact options under your profile?
- Go to the edit profile screen.
- Under the Business Information heading, tap Contact Options.
- From there you can edit the information, hide your address, or change the phone button to say text.
Instagram Profile Checklist for Success
Name — business name or descriptive keyword phrase
Description — use 150 characters or less
Include a CTA in the description
Link — point it to your main conversion goal
Make sure the link is a tracked link
Use LinkTree to funnel audience down different paths
Convert profile to a business account
Get all 7 chapters to Dominating your Instagram Marketing
Need more hands-on help?